
Safe smart home device setup
Smart home devices require a controlled setup process that prepares the device, network connection, power access, and control app before normal use. Safe installation means checking required conditions, completing app pairing, and confirming that the connected device responds correctly after setup.
The smart home devices hub provides broader context for device categories before moving into installation-specific guidance.
A smart home setup can change with the device type, so preparation may involve different power requirements, Wi-Fi conditions, hub needs, app permissions, and safety checks. The smart home devices hub provides broader context for device categories before moving into installation-specific guidance.
Setup issues often occur when a required condition is missed before installation begins.
Setup issues often occur when a required condition is missed before installation begins. Checking compatibility, power availability, network access, account permissions, and the correct pairing process helps create a safer installation path and gives clearer points for troubleshooting if a connection problem appears.
This setup process focuses on preparing and installing smart home devices rather than selecting products, designing full automation routines, completing advanced security configuration, or making direct purchase decisions.
Table of Contents
Setup requirements before installation
Smart home setup requirements define the conditions that must be ready before smart home devices can be installed. The main readiness checks include the device type, app account access, power source, network connection, hub requirement, mounting surface, and required tools.
A missing setup condition can delay installation or prevent the pairing process from completing.
A missing setup condition can delay installation or prevent the pairing process from completing. Preparing the control app, confirming Wi-Fi access, checking the available power source, and arranging the installation area create a clearer setup process before connecting smart devices.
Preparing the control app, confirming Wi-Fi access, checking the available power source, and arranging the installation area create a clearer setup process before connecting smart devices.
Setup requirements before installation can be checked with this checklist:
- Device type: Confirm the smart home device category and its required installation method before starting the setup process.
- App account: Prepare the control app account and required permissions so the device can be paired and managed after installation.
- Power source: Check whether the device requires mains power, battery power, or another supported power source before installation begins.
- Wi-Fi and network access: Confirm access to the required home network before pairing, because network availability affects the connection process.
- Hub requirement: Check whether the smart home device requires a hub or bridge before installation so the correct connection path is prepared.
- Mounting surface: Prepare the installation location so the device can be positioned securely and remain accessible when adjustments or maintenance are needed.
- Tools: Gather the tools and mounting accessories required for the installation method before starting the physical setup.
Confirm compatibility, power, and account access
Compatibility, power, and account access checks determine whether smart home devices are ready to begin pairing. Verify the device compatibility with the control app, confirm the required power condition, and check account permissions before installation moves forward.
A failed check can stop the setup process before the device connects successfully.
A failed check can stop the setup process before the device connects successfully. Reviewing the required app access, hub requirement, battery or outlet condition, and platform limits creates clear go/no-go checks before pairing begins.
Reviewing the required app access, hub requirement, battery or outlet condition, and platform limits creates clear go/no-go checks before pairing begins.
Confirm compatibility, power, and account access with these checks:
- Device compatibility: Confirm that the smart home device supports the intended control app and connection method before pairing.
- Power condition: Verify that the device has the required power source, such as a charged battery or suitable electrical connection, before setup.
- Hub requirement: Check whether the device needs a hub or bridge to connect with the home network and control system.
- Account access: Confirm that the control app account is available and that required permissions allow device setup and management.
- Platform limits: Check whether the device supports the intended platform and region because available functions can differ between supported environments.
For example, a device that requires a hub may not complete pairing through the control app alone until the required hub connection is added.
Prepare the app, Wi-Fi, hub, and installation tools
Preparing the app, Wi-Fi, hub, and installation tools before installation reduces setup failures before the device is powered or mounted. The preparation process confirms that the control app, network connection, hub status, and physical installation items are ready for the next setup stage.
Missing a preparation step can interrupt pairing or delay installation progress.
Missing a preparation step can interrupt pairing or delay installation progress. Completing account sign-in, checking permissions, confirming network conditions, and arranging cables or mounting accessories creates a clearer setup process before connecting smart devices.
- App: Install the control app, complete account sign-in, and allow required permissions such as Bluetooth or location permissions when the setup process requires them.
- Wi-Fi: Confirm the home network details and check whether the required 2.4 GHz network is available when the device setup process requires that connection condition.
- Hub: Prepare the hub by connecting its power source and confirming that its connection status is ready before pairing supported devices.
- Cables: Arrange required cables and connection accessories before installation to reduce interruptions during the setup process.
- Mounting accessories: Prepare the mounting surface and required mounting accessories before positioning the device.
- Tools: Gather the tools required for the installation method so physical setup can continue after the app and network checks are complete.
Network and hub conditions for reliable setup
Network and hub conditions for reliable setup determine whether smart home devices can complete pairing successfully. The main checks include Wi-Fi access, router band selection, hub pairing mode, account linking, signal strength, and device proximity before connection attempts begin.
Reviewing these conditions helps identify the correct setup path before changing broader connectivity settings.
A setup failure can occur when the device cannot reach the correct network, the hub is not ready, or account linking is incomplete. Reviewing these conditions helps identify the correct setup path before changing broader connectivity settings.
A setup failure can occur when the device cannot reach the correct network, the hub is not ready, or account linking is incomplete.
Network and hub conditions for reliable setup can be organized through this comparison:
| Condition | Why it matters | Setup check | Risk if wrong |
|---|---|---|---|
| Wi-Fi network | The device needs access to the intended home network during pairing. | Confirm the correct network name and password before connection. | The device may fail to connect or require reconnection. |
| Router band | Some smart devices require a supported Wi-Fi band during setup. | Check whether the available network matches the device requirements. | The pairing process may not complete. |
| Hub pairing mode | A hub-based device requires the hub to be ready for communication. | Confirm the hub is powered and in the required pairing state. | The device may not be discovered by the control system. |
| Account linking | The control app account connects the device to user access. | Verify login status and required account permissions. | The device may remain unavailable after pairing. |
For Wi-Fi-only devices, the setup path usually focuses on the router connection and control app access. Hub-based devices require an additional communication step because the hub must be available before the device can connect through the system.
The next check is the specific connection condition that prevents the device from completing setup.
For example, a smart device placed close to a router can still fail pairing if the selected network details or hub pairing mode are incorrect. The next check is the specific connection condition that prevents the device from completing setup.
For broader network preparation beyond these setup checks, see connectivity and hub setup .
For broader network preparation beyond these setup checks, see connectivity and hub setup.
Connect the hub and phone to the right network
The phone, hub, and target device need the correct setup environment before local discovery and pairing can continue. Connect the phone to the intended phone Wi-Fi network, confirm the hub is ready, and allow the required permissions to create a reliable local connection sequence for the setup process.
Checking each condition in order helps verify the next setup action before pairing the target device.
A failed connection can occur when the phone uses a different network, the hub has no active connection state, or Bluetooth and local-network permissions are unavailable. Checking each condition in order helps verify the next setup action before pairing the target device.
- Connect the phone Wi-Fi: Select the intended home network on the phone and verify that the phone is connected to the network used for device setup.
- Check the hub status: Confirm the hub has power and that the control app shows the hub as available before attempting device discovery.
- Allow Bluetooth and local permissions: Enable Bluetooth and local-network permissions when the control app requires access to discover nearby connected devices.
- Confirm setup proximity: Place the phone, hub, and target device within the required local setup area when the device pairing method uses nearby communication.
For example, a target device may not appear in the control app when the phone is connected to a different network from the hub. Mesh networks, dual-band networks, or device-specific setup methods may require an additional network check before pairing continues.
Keep device network access stable during pairing
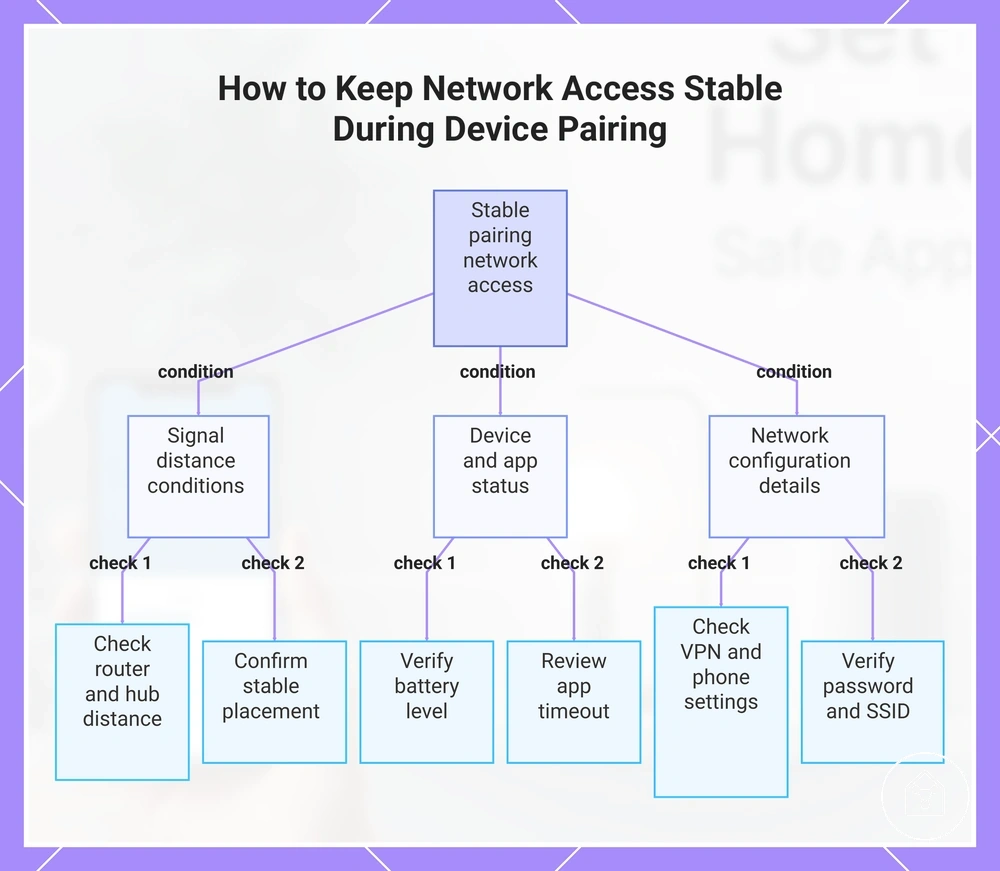
Signal stability during pairing helps connected devices maintain network access while the setup process is completed. Stable access depends on conditions such as router distance, hub distance, battery level, app response, phone settings, and correct network details.
Checking these conditions before retrying helps identify the next setup action needed for a stable connection.
A pairing attempt can fail when the device loses signal, the control app times out, or the connection details do not match. Checking these conditions before retrying helps identify the next setup action needed for a stable connection.
- Check router distance and hub distance: Keep the device within a suitable distance of the router or hub during pairing because distance can affect signal stability and connection reliability.
- Confirm temporary placement: Keep the device in a stable location during setup and avoid moving it until pairing status has been confirmed.
- Verify battery level: Check the battery level before pairing because insufficient power can interrupt the connection process.
- Review app timeout: Restart the pairing attempt when the control app reaches a timeout before completing device discovery.
- Check VPN and phone settings: Review phone VPN settings when they restrict network access required for the pairing process.
- Confirm password and SSID: Verify the Wi-Fi password and selected network name before retrying pairing to support a successful connection.
This chart shows the key conditions that affect network stability during pairing and the checks to verify each condition.
Safe placement, mounting, and wiring checks
A smart home device placed near an unsuitable power source, surface, or environment can create setup risks before regular use begins. Check placement, mounting, and wiring conditions first so the device has suitable access, stable support, and safer operating conditions.
Incorrect placement can reduce signal access, block sensor line of sight, or make resets and battery changes difficult.
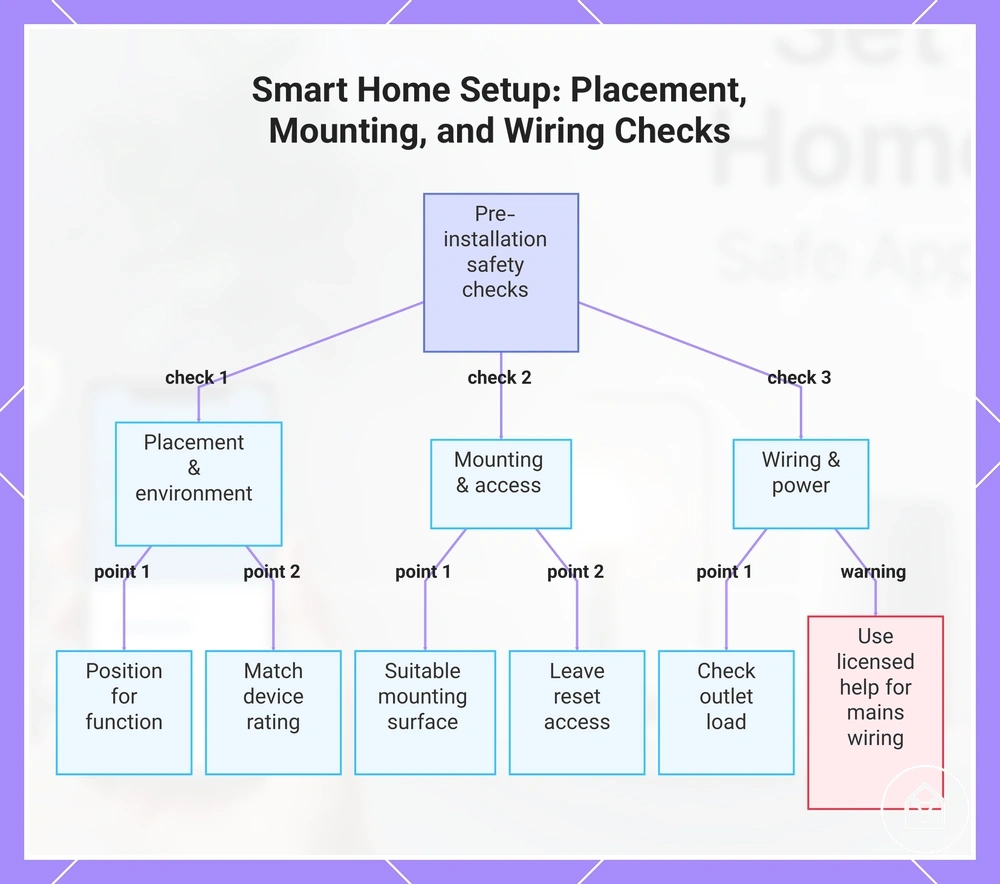
Incorrect placement can reduce signal access, block sensor line of sight, or make resets and battery changes difficult. Reviewing the physical location, mounting surface, and surrounding conditions helps identify safer setup choices before permanent installation.
Reviewing the physical location, mounting surface, and surrounding conditions helps identify safer setup choices before permanent installation.
Safe placement, mounting, and wiring checks can be reviewed with this checklist:
- Placement: Position smart home devices where the intended function has suitable access to the surrounding area and avoid locations that obstruct normal operation.
- Mounting surface: Confirm the mounting surface is suitable for the device and installation method before securing the device.
- Outlet load: Check that the outlet condition is appropriate for the connected device and avoid unclear power situations.
- Cable routing: Arrange cable routing so cables remain protected, accessible, and away from avoidable physical hazards.
- Sensor line of sight: Keep the sensor area clear when device operation requires an unobstructed detection path.
- Indoor rating and outdoor rating: Confirm that the installation environment matches the device rating, especially where moisture or heat exposure may occur.
- Reset access: Leave enough physical access for reset controls, maintenance actions, or battery changes when required.
- Wiring: Avoid changing mains wiring without appropriate knowledge and assistance, especially when switch wiring or unclear electrical conditions are involved.
This chart shows the key safety checks for smart home device installation, covering placement, mounting, and wiring conditions to avoid setup risks.
Position devices near power and reliable signal
A device placement choice can affect whether smart home devices receive power access and maintain a reliable signal during setup and use. Position the device where outlet reach, battery access, and connection conditions support the intended function.
Checking power, signal, and function conditions before final placement helps confirm the next setup condition.
Poor placement can create problems when a device is difficult to power, too far from the router or hub, or affected by physical obstruction. Checking power, signal, and function conditions before final placement helps confirm the next setup condition.
- Power: Check outlet reach and battery access before placement so the device can receive power and remain accessible for maintenance when required.
- Signal: Consider router distance and hub distance when positioning the device, because obstruction and placement can affect signal reliability.
- Function: Review the sensor angle and surrounding area so the device can detect or respond as intended without unnecessary blockage.
Handle smart switch wiring safely
A smart switch installation requires safe wiring checks before the switch is connected to an existing circuit. Confirming power isolation, neutral wire requirements, switch box conditions, and circuit details helps define the safety limits for smart switch wiring.
Unclear wiring conditions can create risks when a smart switch does not match the existing electrical setup.
Unclear wiring conditions can create risks when a smart switch does not match the existing electrical setup. Checking the wiring arrangement and stopping when circuit details are uncertain helps determine whether professional installation is the safer next step.
Checking the wiring arrangement and stopping when circuit details are uncertain helps determine whether professional installation is the safer next step.
Handle smart switch wiring safely with these checks:
- Power isolation: Confirm that power is isolated before any inspection or installation activity involving wiring.
- Neutral wire: Check whether the smart switch requires a neutral wire and whether the existing wiring provides the required connection.
- Switch box: Verify that the switch box has suitable space and conditions for the smart switch installation.
- Circuit: Stop when the circuit layout or wiring condition is unclear, because the correct installation approach cannot be confirmed safely.
- Professional installation: Use professional installation when local electrical rules, mains wiring conditions, or uncertainty about the circuit make DIY work unsuitable.
Pair smart home devices with the control app
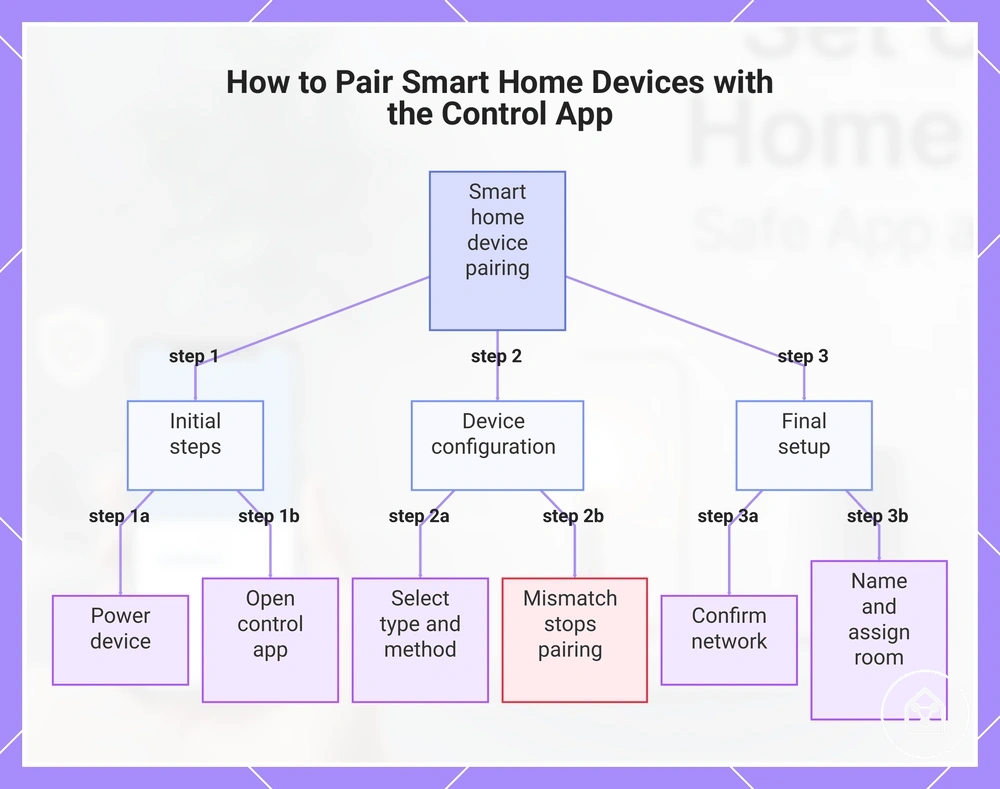
Pairing smart home devices with the control app connects the device, app account, and network into one controllable setup. The app pairing flow guides the device through a setup path that can include powering the device, selecting the device type, and confirming the connection conditions.
Following the correct sequence helps verify each stage before the device is used through the control app.
A pairing attempt can stop when the selected device type, QR code method, discovery option, or network details do not match the available setup path. Following the correct sequence helps verify each stage before the device is used through the control app.
- Power the device: Turn on the smart home device and confirm that it is ready for pairing before starting the control app setup.
- Open the control app: Sign in to the required account and start the device setup process from the app.
- Select the device type: Choose the matching device category so the control app uses the relevant pairing path.
- Choose QR code or discovery: Scan the QR code when available, or select discovery when the control app searches for supported devices automatically.
- Confirm network details: Review the network details during setup and confirm that the device is using the intended home network connection.
- Create a device name: Assign a device name that makes the connected device easier to identify and control.
- Assign a room: Select the room location so the device can be organised within the control app.
For example, a device with a QR code may use a scan-based setup path, while another device may use automatic discovery through the control app. The available pairing method can change with the device model, app settings, and setup conditions.
The available pairing method can change with the device model, app settings, and setup conditions.
This chart shows the step-by-step pairing process and includes a warning about conditions that can cause pairing failure.
Put devices into pairing mode
Smart home devices become discoverable when the correct pairing mode action is completed for the device type. This action can involve a setup button, indicator light, battery insertion, or a factory-new state that allows the control app or hub to detect the device.
Checking the device condition and confirming the correct pairing action helps identify the next setup step.
A device may not appear during discovery when it is not ready for pairing, the timeout window has ended, or a reset condition has changed the device state. Checking the device condition and confirming the correct pairing action helps identify the next setup step.
- Power the device: Insert the battery or connect the required power source, then confirm the device is ready before starting discovery.
- Activate pairing mode: Use the setup button or required device action to place the device into pairing mode according to its setup method.
- Check the indicator light: Confirm the indicator light shows the expected pairing state before searching from the control app or hub.
- Confirm the device condition: Check whether the device is in a factory-new state or whether a reset has changed the discovery condition.
- Complete discovery within the timeout: Start the control app or hub discovery process while the device remains available for pairing.
Add and label devices in the app
Smart home devices need clear labels after pairing so users can identify and control them more easily. Adding a device name and room assignment creates a clearer app structure for control, troubleshooting, and managing connected devices.
Smart home devices need clear labels after pairing so users can identify and control them more easily.
Unclear labels can make devices harder to find or create confusion when multiple devices have similar functions. Reviewing the device name, room, icon, category, user access, and app confirmation helps verify that the setup process is complete.
- Set the device name: Choose a clear device name that identifies the device function and reduces confusion when using the control app.
- Assign a room: Select the room where the device is located so connected devices can be organised by location.
- Select an icon and category: Choose an icon or category that matches the device type when these options are available in the app.
- Review user access: Confirm user access and sharing permissions when other users need control of the device.
- Check voice assistant names: Review the device name when using a voice assistant because similar names can create command conflicts.
- Confirm app status: Check the app confirmation status to verify that the device has been added and is ready for control.
For example, names such as “Kitchen Light” and “Living Room Light” create clearer voice assistant commands than identical device names. A room assignment also helps users locate the correct device when several connected devices appear in the control app.
Install common smart home device types
Smart home devices use similar setup steps, but installation changes by device type because power method, mounting, pairing, and safety conditions are different. Smart plugs, smart switches, smart sensors, and a hub follow the same setup logic while requiring different checks before they can be used.
The comparison below organises the main differences between common device types and the checks required during setup.
Using the same installation approach for every device type can create problems when power, placement, wiring, or safety conditions change. The comparison below organises the main differences between common device types and the checks required during setup.
| Device type | Setup difference | Main check | Safety note |
|---|---|---|---|
| Smart plugs | Smart plugs use an outlet-based power method and require placement near a suitable power source. | Check the outlet condition and connected load before pairing the plug with the control app. | Avoid using the plug when the outlet or connected load conditions are unclear. |
| Smart switches | Smart switches use a wired installation method that depends on existing switch box and circuit conditions. | Check wiring conditions and switch box suitability before installation. | Unclear wiring conditions require a safer assessment before continuing. |
| Smart sensors | Smart sensors rely on mounting and placement conditions because their position affects detection function. | Check sensor placement, mounting position, and the intended trigger area before pairing. | Obstructions or unsuitable placement can affect sensor operation. |
| Hub | A hub connects supported smart devices through its own setup and pairing process. | Check power, network access, and pairing readiness before adding connected devices. | Follow the hub and device setup conditions before connecting supported devices. |
Set up smart plugs
A smart plug setup connects a plug-in device to an outlet, power source, control app, and connected appliance. The plug-in setup method follows a short sequence of checking the outlet, confirming load suitability, powering the smart plug, completing app pairing, and testing control.
Incorrect outlet selection or unsuitable appliance use can create setup risks before the smart plug is used.
Incorrect outlet selection or unsuitable appliance use can create setup risks before the smart plug is used. Checking the power conditions and confirming each setup stage helps verify whether the smart plug is ready for the next check.
- Choose the outlet: Connect the smart plug to a suitable outlet and confirm the outlet location supports the intended setup.
- Check load suitability: Confirm that the connected appliance matches the smart plug requirements before use, because unsuitable loads can create a safety risk.
- Confirm the power-on state: Turn on the smart plug and check that it is ready for the app pairing process.
- Complete app pairing: Add the smart plug through the control app and confirm that the device connects through the required home network conditions.
- Name and test the device: Assign a device name in the app, then complete test switching to verify that control commands operate correctly.
Set up smart switches
A smart switch setup requires checking wiring compatibility and electrical conditions before the device is connected. The setup process includes confirming power isolation, fitting the switch safely, completing app pairing, naming the device, checking the load type, and testing physical control and app control.
Incorrect wiring assumptions or unclear circuit conditions can create safety risks during smart switch installation.
Incorrect wiring assumptions or unclear circuit conditions can create safety risks during smart switch installation. Checking each condition before continuing helps confirm whether the setup can proceed or whether a safer assessment is needed.
- Check wiring compatibility: Confirm that the smart switch matches the existing wiring arrangement and installation conditions before continuing.
- Confirm power isolation: Use power isolation before any inspection or installation activity involving the switch wiring.
- Check fitting and load type: Confirm that the smart switch fits the installation location and that the connected load type matches the device requirements.
- Complete app pairing: Add the smart switch through the control app and confirm that the device connects through the required setup conditions.
- Test physical and app control: Check the physical switch response and app control after setup to confirm that both control methods operate correctly.
Set up smart sensors
A smart sensor setup starts with placing the sensor correctly, activating the battery, pairing the device, and confirming the trigger response. Sensor placement and trigger setup determine how the smart sensor detects the intended action through conditions such as mounting position, range, line of sight, or contact alignment.
A sensor may not respond when battery activation, placement, or trigger conditions are incorrect.
A sensor may not respond when battery activation, placement, or trigger conditions are incorrect. Checking the sensor type, mounting position, and connection status helps identify the next setup condition before testing the device.
- Activate the battery: Insert or enable the battery and confirm that the smart sensor enters its ready state before starting setup.
- Select the sensor type: Choose the correct sensor type in the control app so the setup process follows the required pairing method.
- Complete pairing: Add the smart sensor through the app and confirm that the device connection is ready before mounting.
- Choose the mounting position: Place the sensor where the range, line of sight, or contact alignment supports the intended trigger condition.
- Confirm the trigger test: Test the sensor response and verify that the trigger test matches the expected physical action.
Test checklist: Confirm battery activation, verify mounting position, check contact alignment or line of sight where applicable, and confirm that the trigger test produces the expected app response.
Apply basic security settings during setup
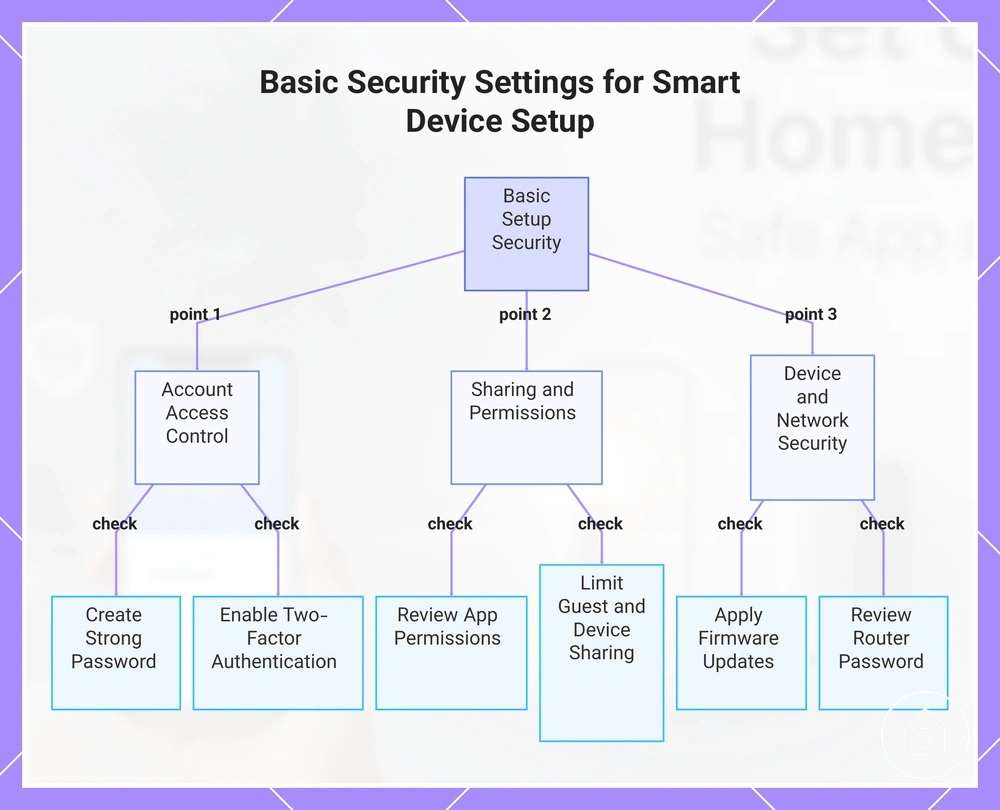
Security settings should be applied when smart devices are first connected so account access, app control, and sharing options are reviewed before regular use. Basic setup security focuses on protecting access through passwords, authentication, permissions, updates, and device sharing controls.
Unreviewed access settings can create privacy and security risks when connected devices are added to a home network.
Unreviewed access settings can create privacy and security risks when connected devices are added to a home network. Checking these settings during the setup process helps create safer access conditions before devices are used regularly.
Checking these settings during the setup process helps create safer access conditions before devices are used regularly.
Apply basic security settings during setup with this checklist:
- Password: Create a strong account password and avoid reusing passwords from other accounts to reduce account access risks.
- Two-factor authentication: Enable two-factor authentication where available to add an additional account verification step.
- App permissions: Review app permissions and allow only the access required by the control app and connected devices.
- Guest access: Check guest access settings and limit shared control to users who need access.
- Firmware: Check firmware update status and apply available updates when supported by the device setup process.
- Router password: Review router password hygiene and confirm that the home network uses appropriate access protection.
- Device sharing: Review device sharing limits before adding other users or connected accounts.
Basic setup security improves initial access control but does not replace deeper security hardening. For additional practices beyond first-time setup, see secure smart home devices.
For additional practices beyond first-time setup, see secure smart home devices .
This chart shows the three categories of security settings to apply during smart device setup to reduce access risks.
Secure Wi-Fi, passwords, and device accounts
Wi-Fi and account protection should be reviewed when connected devices are first paired to reduce avoidable access risks. Local protection focuses on securing the home network, device account, and shared access settings through passwords, authentication, and permission checks.
Unreviewed network or account settings can create unclear access conditions after setup.
Unreviewed network or account settings can create unclear access conditions after setup. Checking these settings during the setup process helps confirm that smart devices have appropriate protection before regular use.
- Wi-Fi: Check that connected devices use the intended home network and consider a guest network when separating device access is appropriate for the network setup.
- Password: Create a unique password for each device account and avoid reusing passwords from other accounts.
- Two-factor authentication: Enable two-factor authentication when available to add another verification step for account access.
- Shared users: Review shared users and permissions before allowing other people to control connected devices.
- Recovery details: Confirm recovery details so the device account can be restored if access issues occur.
- Notifications: Review app notifications for account activity, permission changes, or access requests.
Update firmware before regular use
Firmware updates should be checked before smart devices become part of daily control because updates can improve security, compatibility, or stability depending on the device and app. Setup-time firmware update means reviewing the available firmware state before relying on the device for regular use.
An interrupted update or unstable device condition can prevent the firmware process from reaching completion status.
An interrupted update or unstable device condition can prevent the firmware process from reaching completion status. Checking the update prompt, device power, and restart behavior helps confirm the next setup condition before returning the device to normal control.
- Check the update prompt: Review the control app for an available firmware update prompt before completing the setup process.
- Confirm device power: Keep device power stable during the firmware update because interruption can affect completion status.
- Follow the hub update sequence: If a hub is part of the setup, check the hub update order before updating connected devices.
- Verify completion status: Confirm that the firmware update shows completion status before using the device regularly.
- Allow restart: Let the device restart when required and confirm that the connection returns after the update.
Firmware updates are part of initial device care, but they do not replace broader maintenance practices. For continued upkeep after setup, see maintain smart home devices.
Test devices before using automations
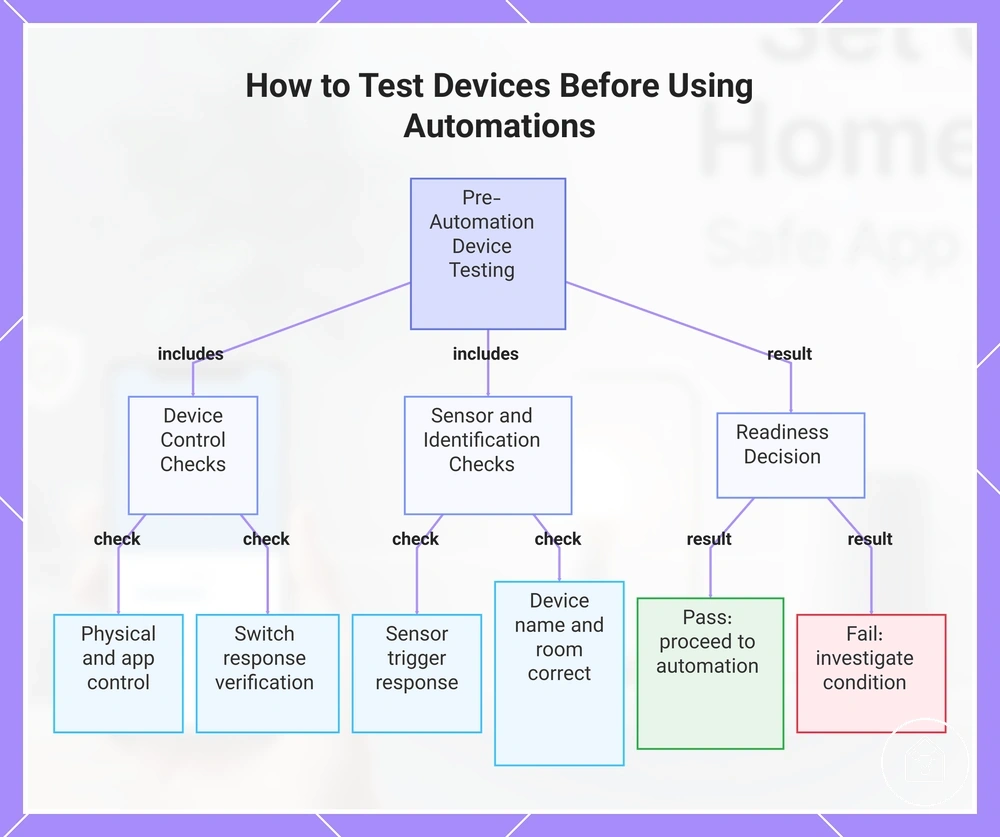
Test devices before using automations to verify that manual control, app control, sensor responses, and device settings work correctly before routines depend on them. These checks confirm whether connected devices are ready for automation without repeating the full setup process.
These checks confirm whether connected devices are ready for automation without repeating the full setup process.
Use this checklist to verify control, response, placement, and readiness before adding automation:
- Manual control: Confirm that physical device actions work before relying on automated commands.
- App control: Check that the control app can send commands and that the device responds under the current connection conditions.
- Sensor trigger: Test each sensor trigger and confirm that the expected response occurs after the detected action.
- Switch response: Verify that switch response matches both physical input and app control commands.
- Device name and room assignment: Check that the device name and room assignment identify the intended device before creating automation rules.
- Notifications: Confirm that notifications appear when the device condition requires an alert or status update.
- Failure signs: Review missed commands, delayed responses, or unavailable devices as signs that a condition needs checking before automation.
Each result creates a decision point: a verified device can move toward automation, while an unexpected response requires checking the related condition first. For example, a sensor trigger that does not create the expected notification may require reviewing the control app settings or device connection before adding a routine.
Learn more about automation after setup when devices are ready for automated actions.
Use the test results as the final criteria for automation readiness: device control, naming, room assignment, and responses should match the intended use before automated actions are created. Learn more about automation after setup when devices are ready for automated actions.
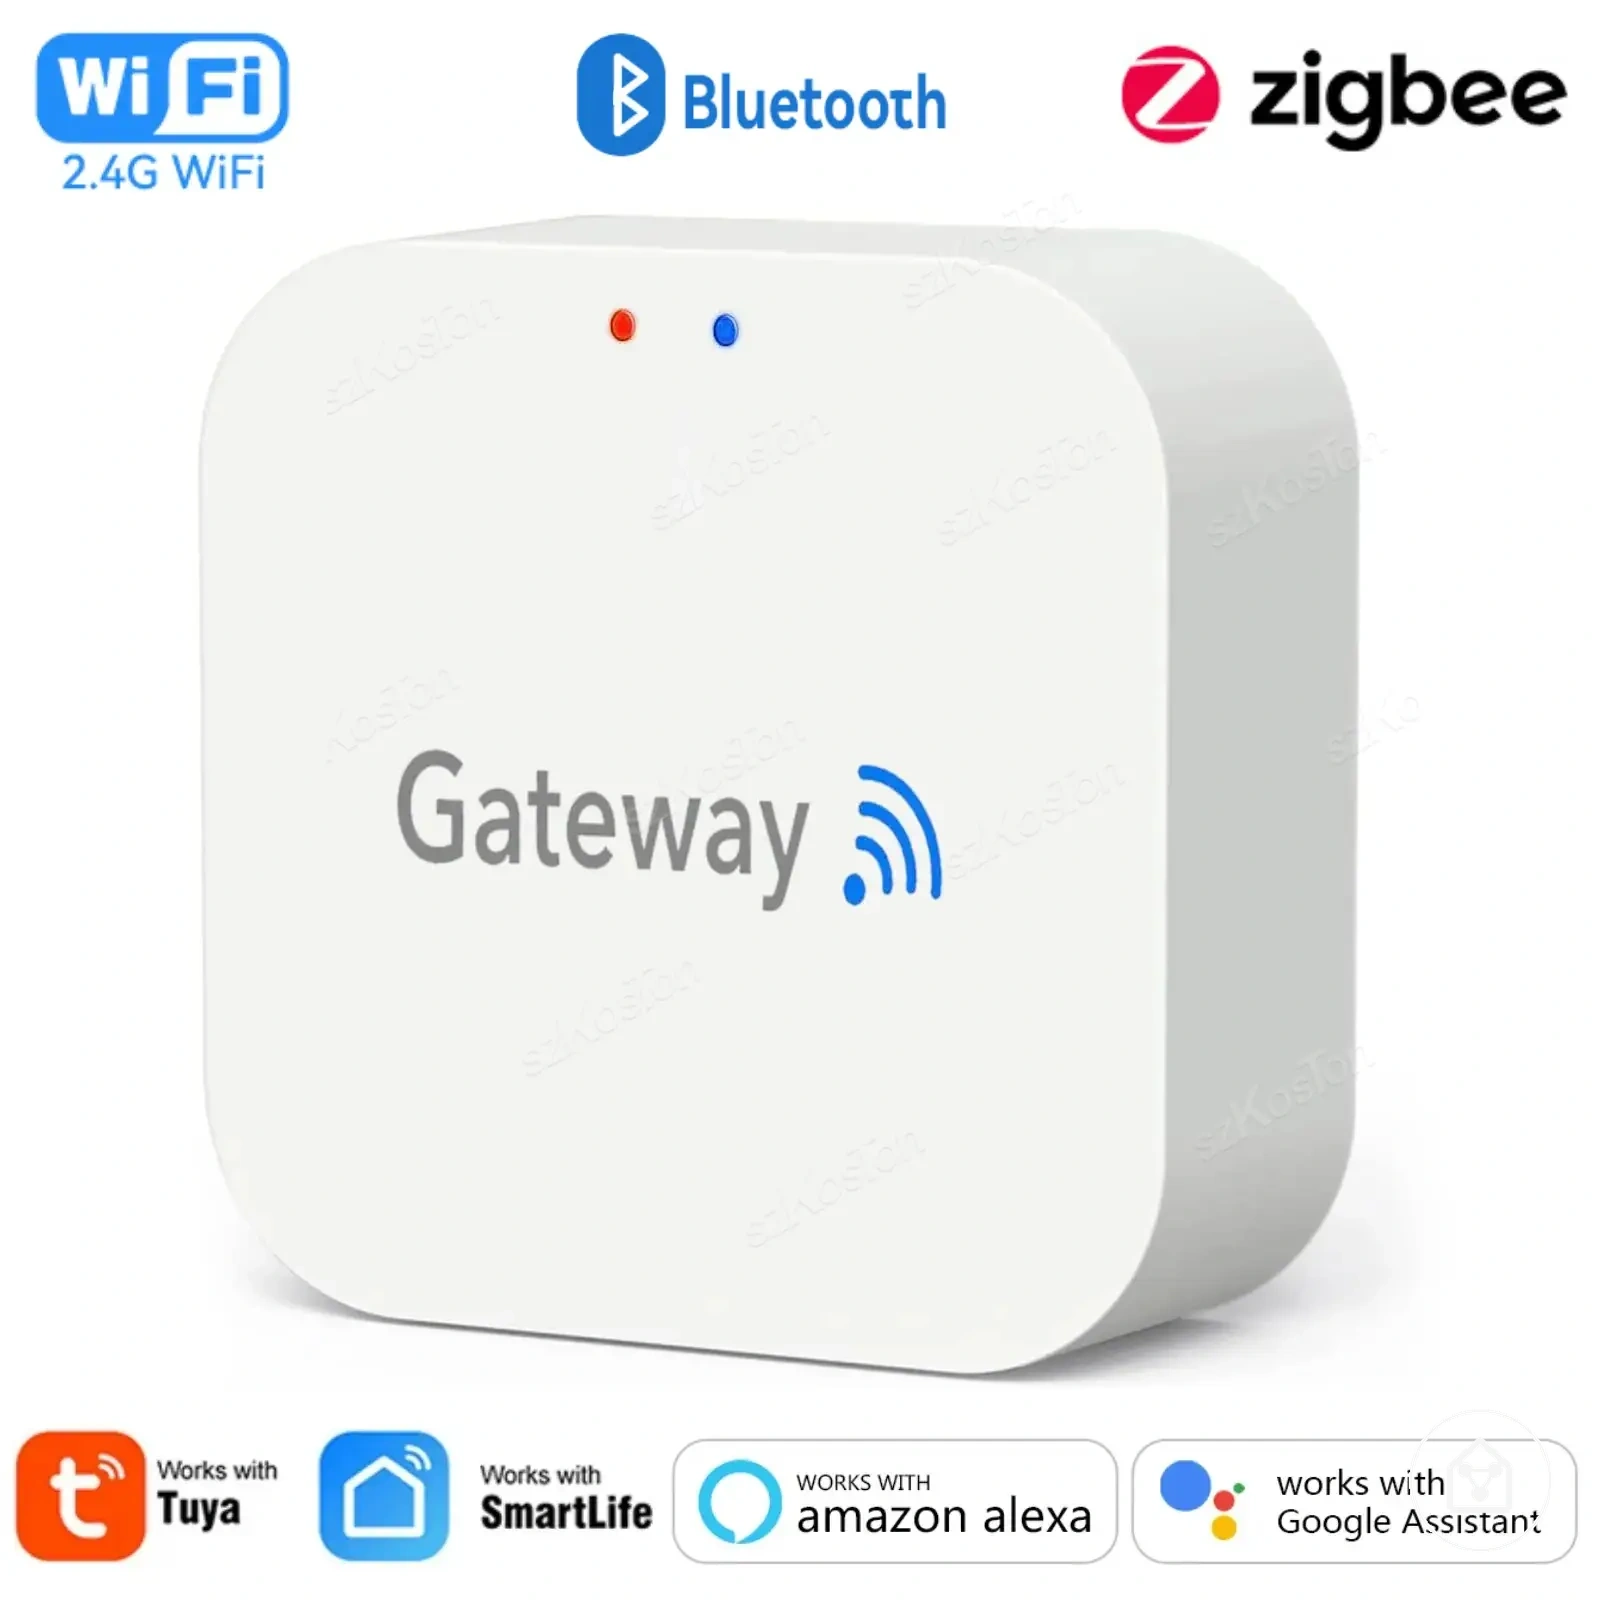
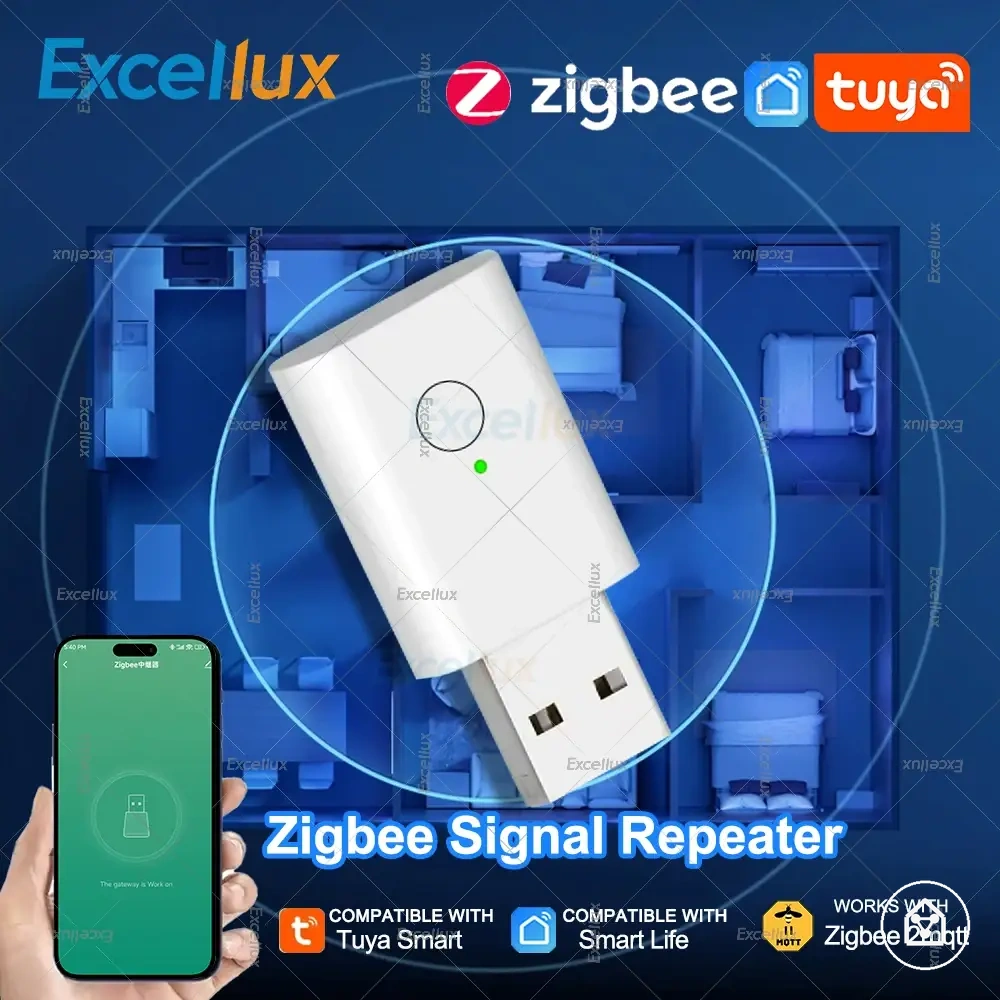
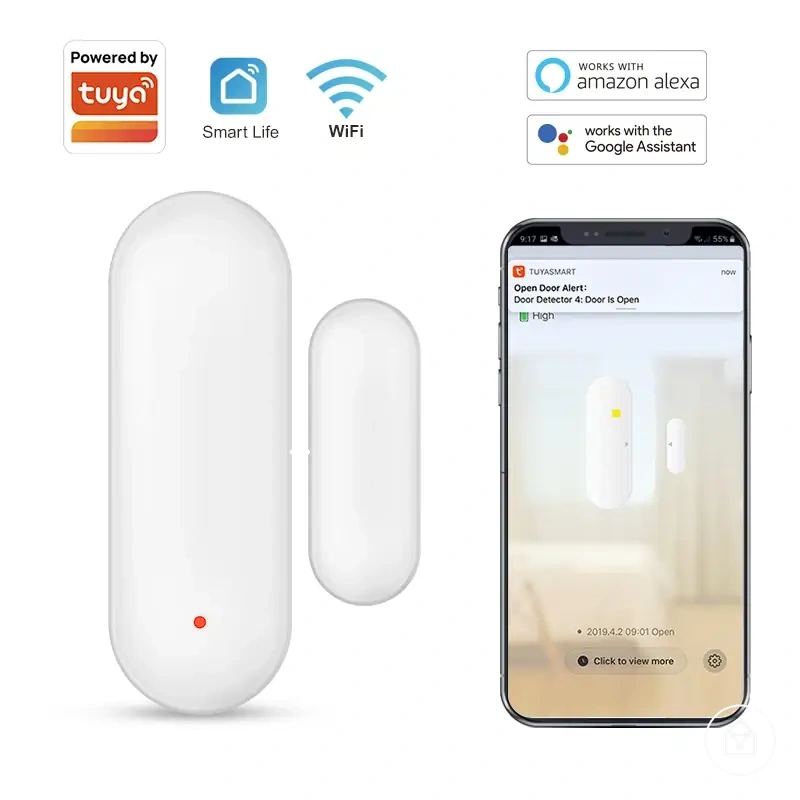
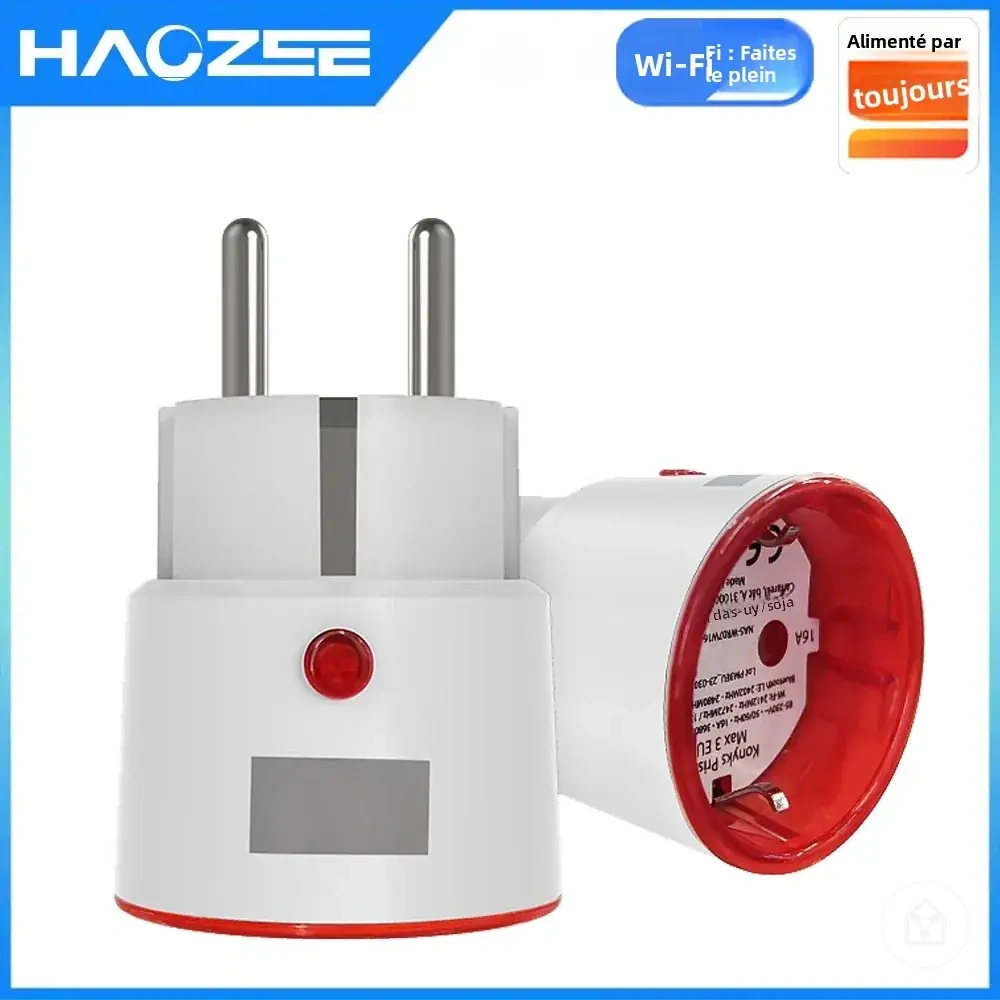
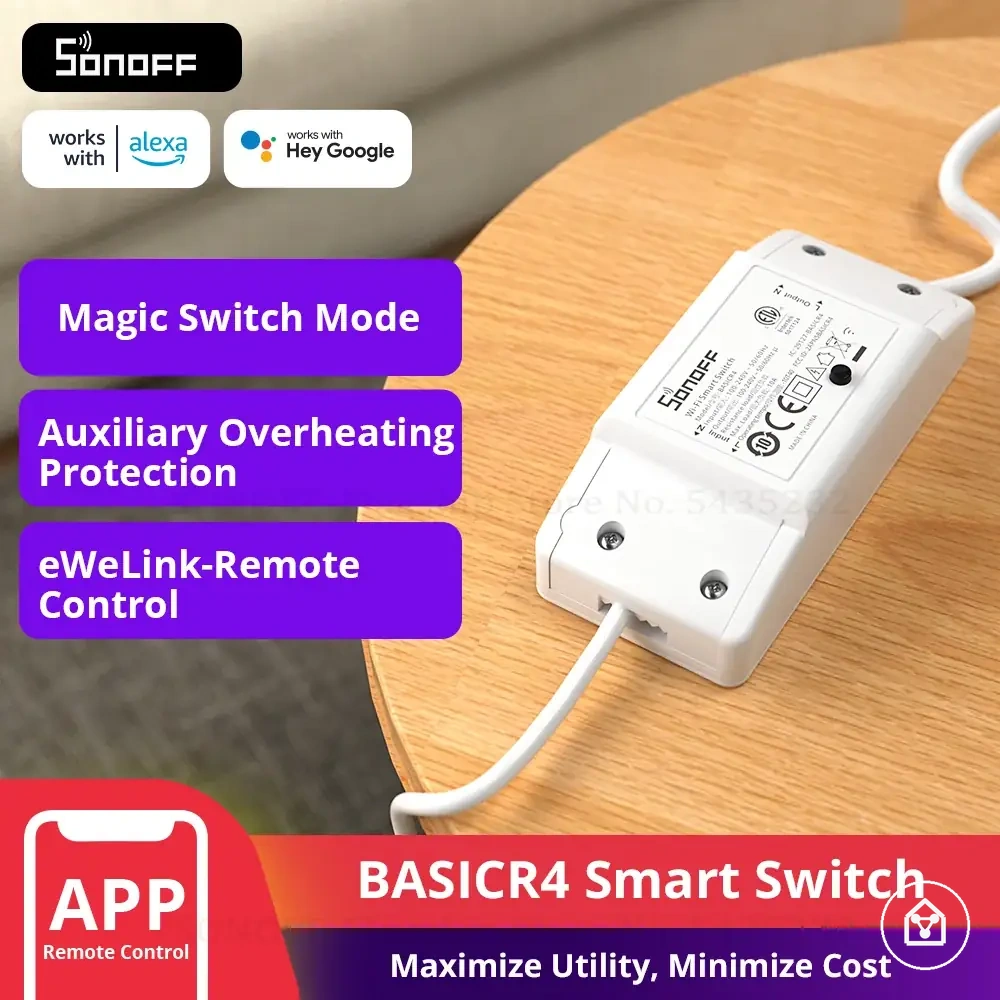
The products below are useful examples for comparing available options.
The products below are useful examples for comparing available options. Before buying, check that the compatibility criteria, key features, and product details match your needs.
This chart shows the essential tests to verify device readiness for automation, including control, sensor, and identification checks, and how to interpret results.
Fix common setup and pairing problems
Setup problems are commonly linked to power, network access, app access, pairing mode, distance, or firmware state. Diagnosing the condition behind a symptom helps identify the next action without treating every pairing failure as the same issue.
Setup problems are commonly linked to power, network access, app access, pairing mode, distance, or firmware state.
Fix common setup and pairing problems by matching the symptom with a likely cause, checking the related condition, and applying the next setup action.
| Symptom | Likely cause | Check | Next action |
|---|---|---|---|
| Device does not turn on | Power is not available or the device is not in a ready state. | Check the power source, battery condition, or device connection. | Restore power and restart the setup process. |
| Pairing failure | Network conditions, distance, or pairing mode may prevent device discovery. | Check the home network, device distance, and pairing mode status. | Activate pairing mode again and retry the connection. |
| App cannot access the device | App access, account permissions, or control app settings may be incomplete. | Review app permissions and account access conditions. | Update access settings and repeat device discovery. |
| Device remains unavailable after setup | Firmware state or connection conditions may affect device availability. | Check firmware status and confirm the device connection state. | Complete available updates or reconnect the device. |
| Reset does not restart setup | The reset process may not have changed the device state. | Confirm the reset action and check the device response. | Repeat the reset process according to the device setup method. |
A setup failure diagnosis should connect the symptom, likely cause, check, and next action. For example, a pairing failure after moving a device farther from its connection point may require checking distance and network conditions before attempting a reset.
For broader device troubleshooting, see fix smart home devices not working .
When the issue continues after setup checks, the problem may no longer be only a setup condition. For broader device troubleshooting, see fix smart home devices not working.
Reset devices that will not pair
A reset is appropriate when an undiscoverable device remains in pairing failure after power, network, app access, and pairing mode checks have been reviewed. Reset conditions depend on the device model, but the purpose is to clear a previous account connection or stale pairing state before starting the setup process again.
Check the cause before using reset, then confirm the device state before re-entering pairing mode.
A device can remain unavailable when a previous account binding or stale pairing state prevents a new connection. Check the cause before using reset, then confirm the device state before re-entering pairing mode.
- Check previous account binding: Confirm whether the device is still connected to a previous account because account binding can prevent a new setup attempt.
- Review stale pairing state: Check whether an incomplete pairing attempt has left the undiscoverable device in a state that blocks new pairing.
- Apply the reset method: Use the device-specific reset option, such as a reset button or control app reset, when earlier checks indicate reset is required.
- Confirm the indicator: Check for indicator confirmation that the reset process has changed the device condition before continuing.
- Re-enter pairing mode: Start pairing mode again after reset confirmation and continue the setup process.
Reconnect devices after Wi-Fi changes
A Wi-Fi change can disconnect smart devices when the SSID, password, Wi-Fi band, or router replacement changes the saved network details. Reconnection requires checking the updated connection information and confirming whether app reconfiguration, hub connection, or reset is needed.
Connected devices may lose access when stored network details no longer match the current home network.
Connected devices may lose access when stored network details no longer match the current home network. Check the connection path first because some devices can reconnect by updating network details without clearing the existing setup state.
- Check SSID and password: Confirm that the device connection details match the current SSID and password after the Wi-Fi change.
- Verify phone network: Check that the phone running the control app is connected to the intended network during reconnection.
- Confirm hub connection: If a hub is used, check the hub connection before attempting to reconnect connected devices.
- Complete app reconfiguration: Update network details through app reconfiguration when the control app requires new connection information after a router replacement.
- Consider reset: Use reset only when the device remains unavailable after checking SSID, password, network details, and hub connection conditions.